
- Adorable DIY animal costumes for infants
- Fun and Creative Animal Costume Ideas
- Essential Materials and Tools
- Step-by-Step Guide to Making Costumes
- Safety Tips for Dressing Infants
- Capturing the Perfect Halloween Photos
When it comes to Halloween, dressing your little one in an adorable DIY animal costume can make the celebration even more special. Leveraging the charm of creativity and homemade outfits, you can not only save money but also create unforgettable memories. Consider a cute animal theme that is both simple and delightful, ensuring comfort for your infant.
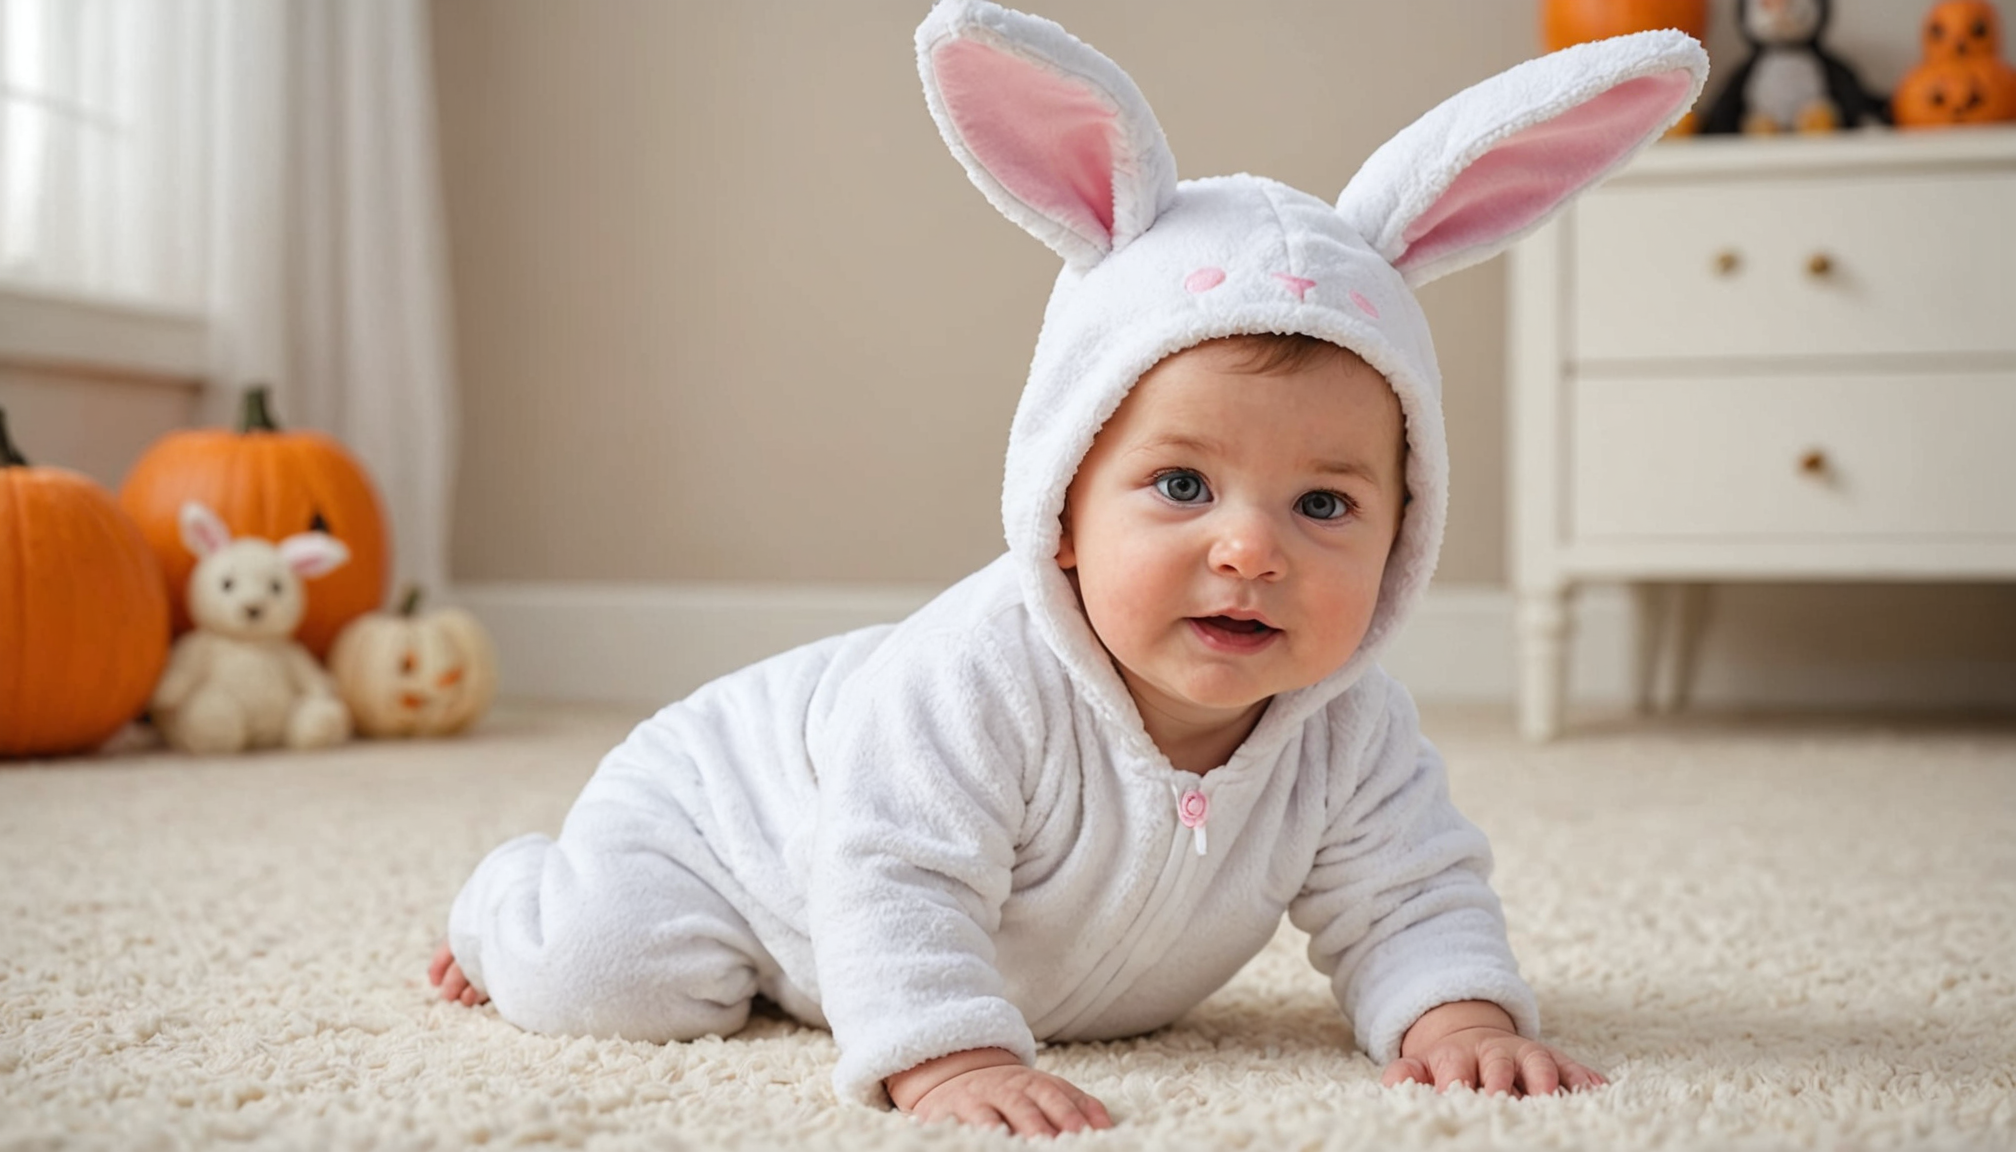
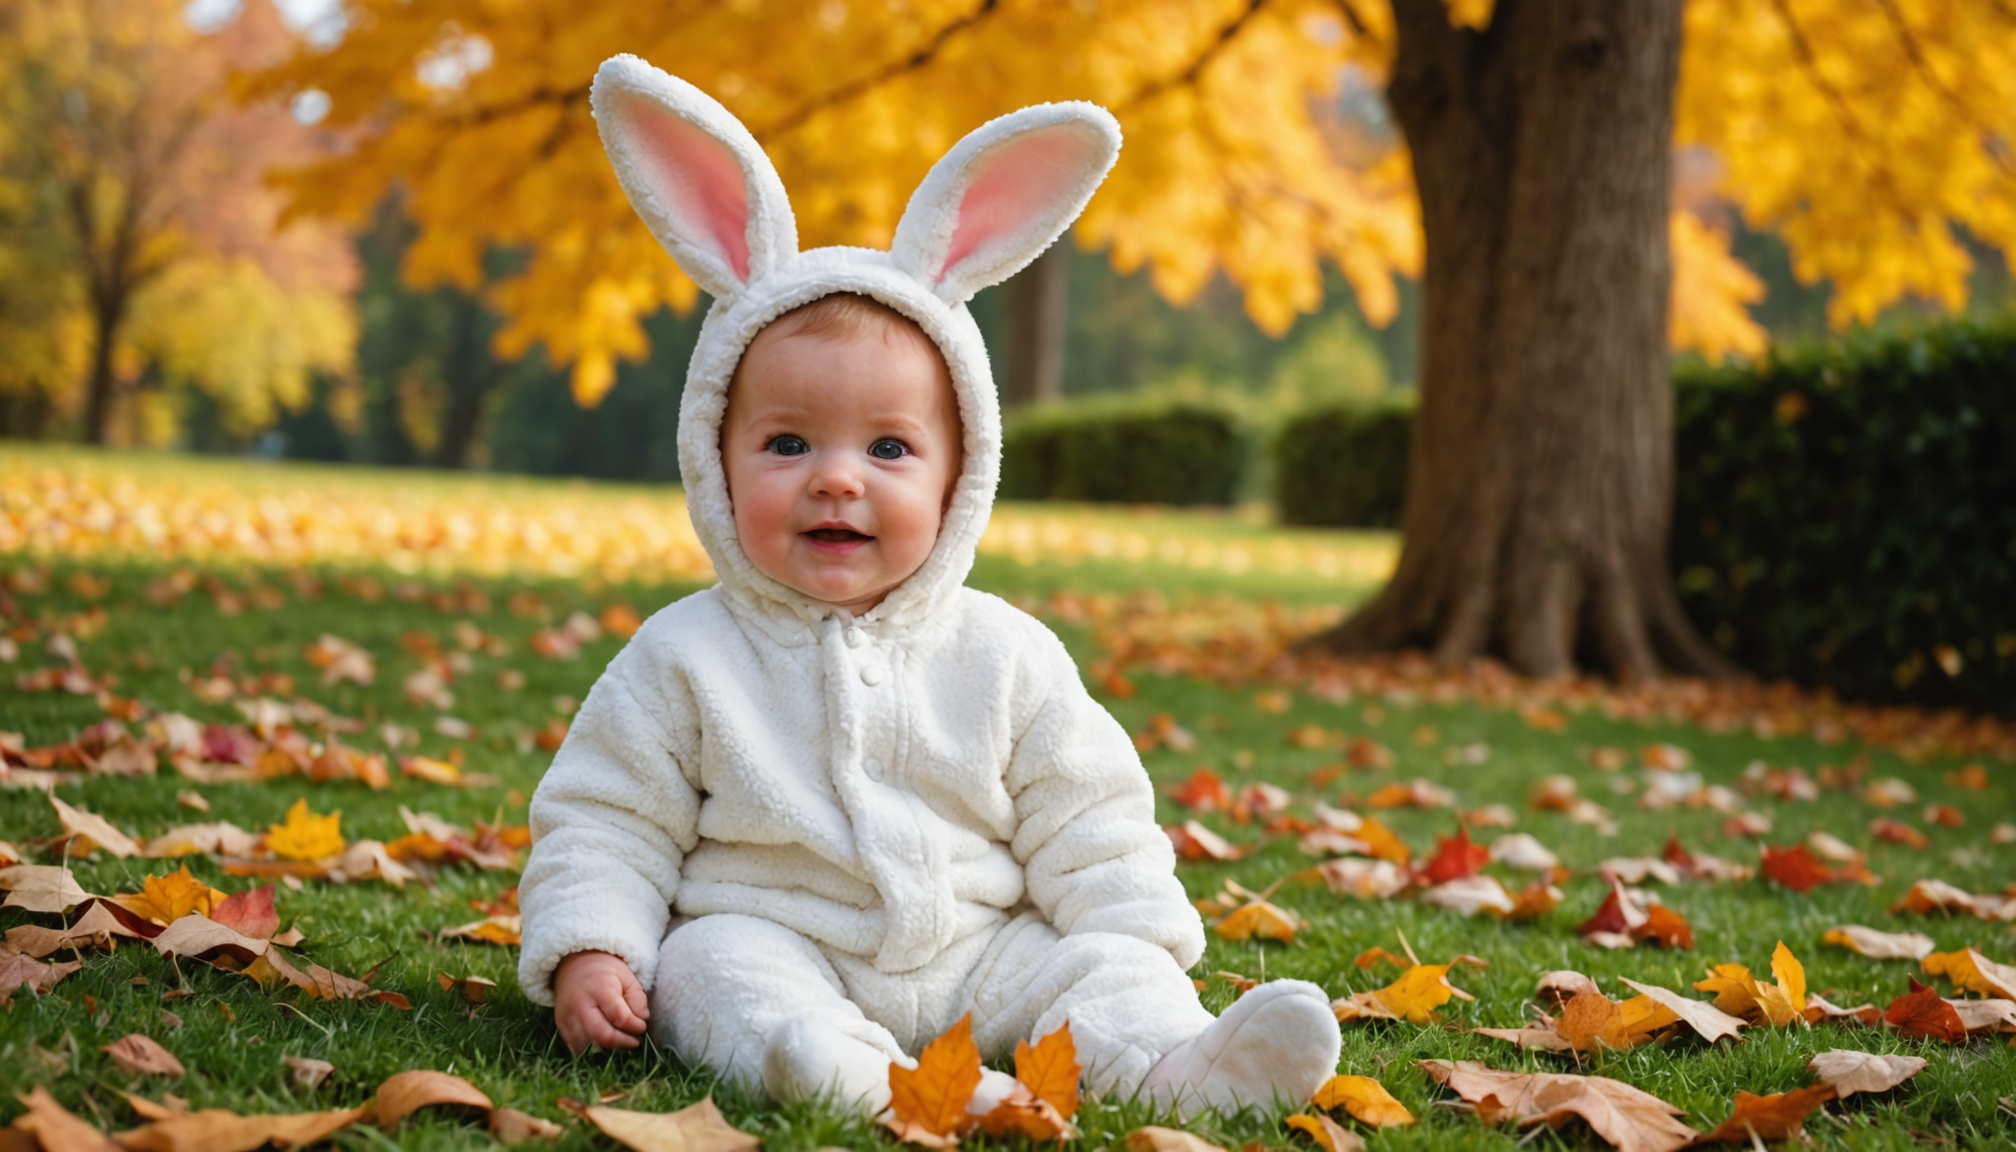
One of the simplest and cutest costumes you can make is a bunny. For this costume, gather a soft white onesie as your base. Use felt fabric to cut out elongated ears, and attach them to a headband. You can even add a little pink felt for the inner part of the ears. To complete the look, a small cotton ball can act as the bunny’s tail, stitched or safety-pinned onto the back of the onesie. This costume not only looks adorable but allows for easy diaper changes!
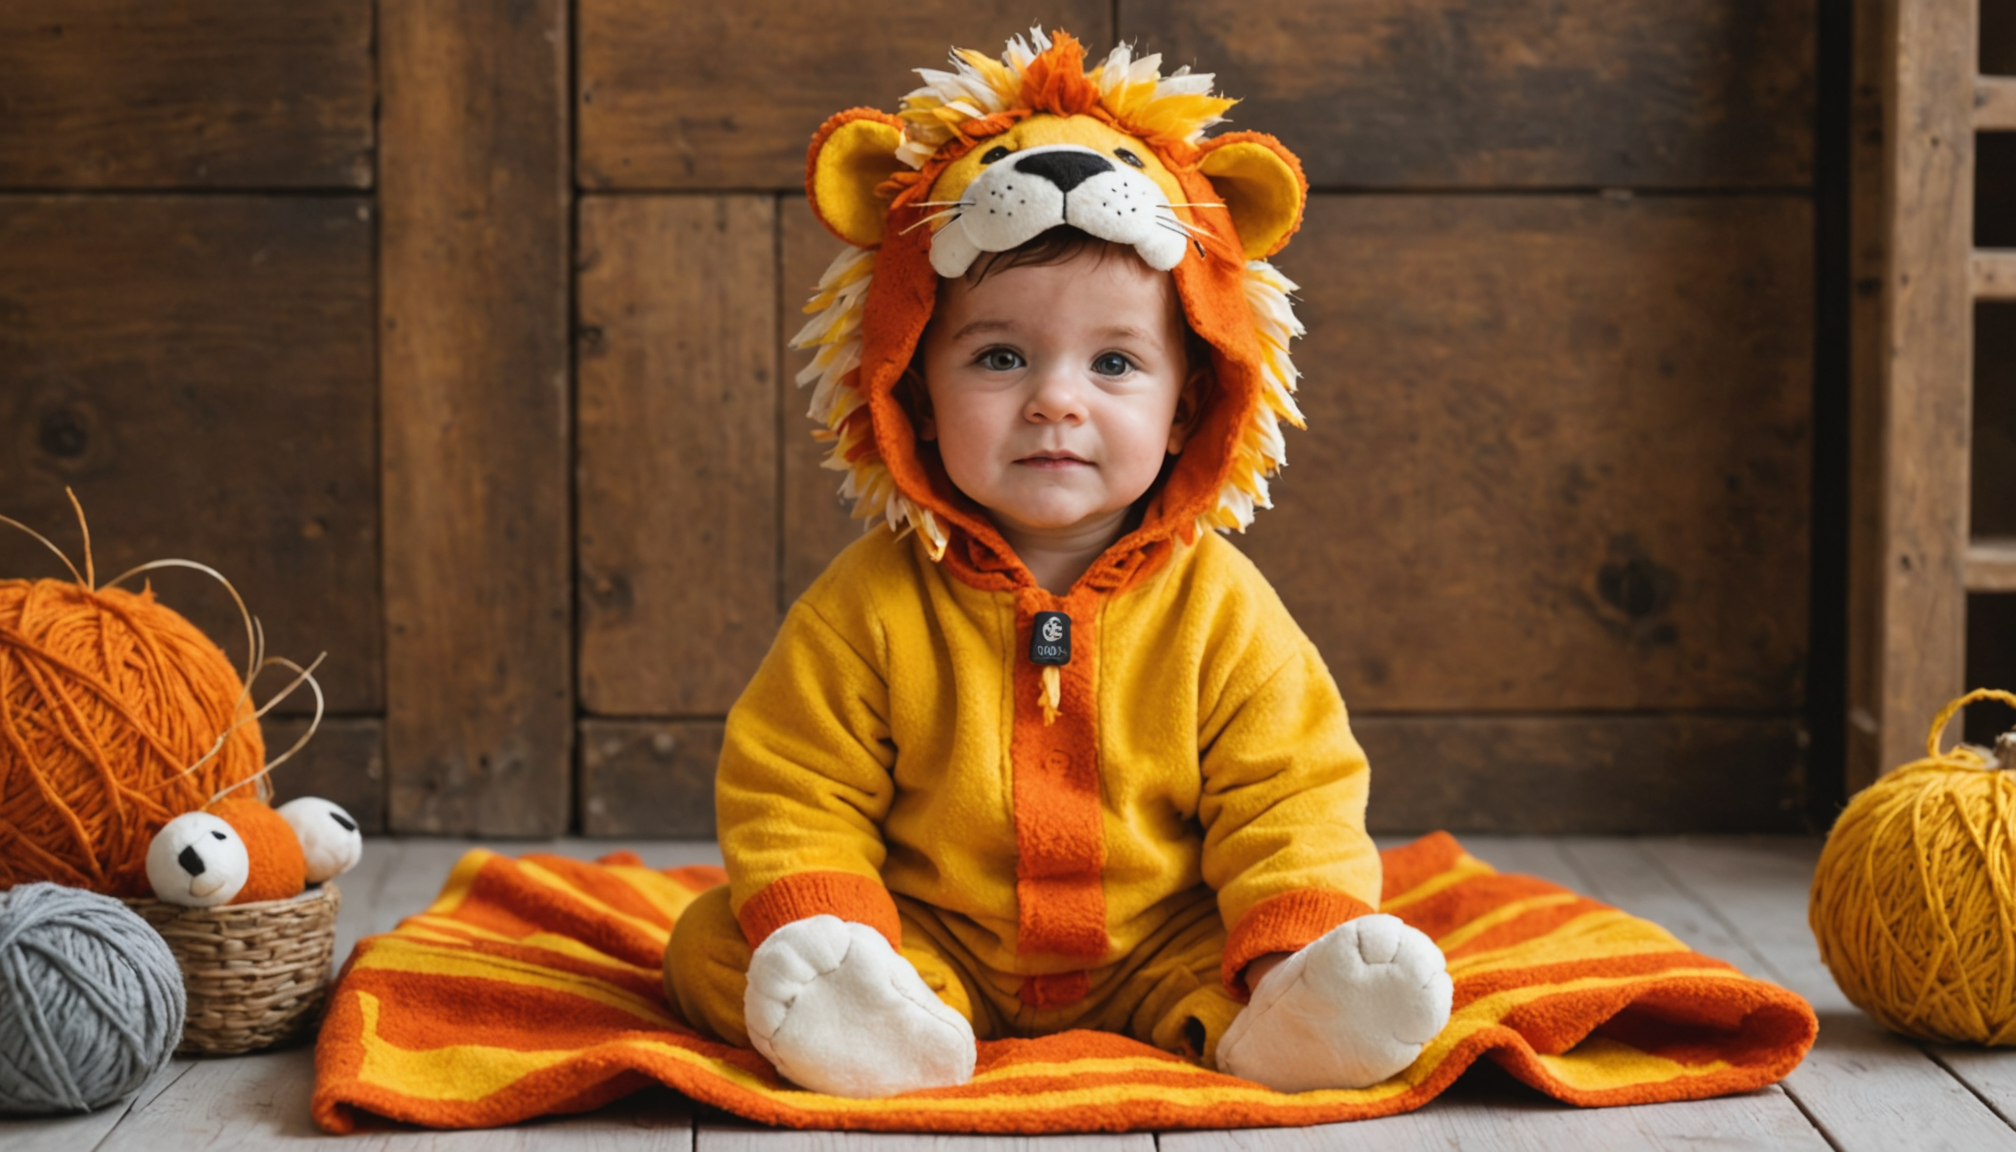
Another fun option is a little lion. Start with a yellow or tan onesie and craft a mane using strips of brown felt or fuzzy yarn. Simply attach them around the neckline to create that fierce yet cute look. Adding a felt nose and some whiskers can finish the ensemble perfectly. The overall experience of making these costumes fosters family bonding and can be a fun activity for siblings to join in on.
For a more whimsical approach, consider turning your infant into a chick. A bright yellow outfit paired with yellow booties can set the stage. Use a hood or hat attached to a yellow onesie, and cut out flaps to create wings from yellow felt, attaching them to the sides of the costume. Accent the look with a beak made from orange felt, simply fashioned into a small triangle that can be secured with a soft headband.
Remember, it’s essential to keep your infant’s comfort your top priority. Choose soft materials that won’t irritate their sensitive skin. Make sure any attached items, such as tails or ears, are secure and can’t easily come loose, which could pose a choking hazard. When creating eye-catching costumes, keep safety in mind by avoiding small decorations that can detach easily.
In this DIY journey, do not hesitate to involve your family in the process. It can be an exciting and entertaining family project that reflects your creativity and the love for your little one’s first Halloween. Have fun, get messy, and embrace the magic of crafting together!
Fun and Creative Animal Costume Ideas
One of the standout costumes for infants is the adorable ladybug. Starting with a red onesie, consider adding black felt spots to mimic the look of a ladybug’s back. These can be sewn or glued on securely, ensuring they won’t come off while your baby is crawling around. To enhance the costume further, create a pair of small black wings from lightweight fabric and attach them with elastic bands around the shoulders. A matching headband with two small antennae fashioned from pipe cleaners can tie the whole look together, making your baby the cutest ladybug on the block.
Another imaginative option is the classic elephant costume. For this, use a gray onesie as the base. You can make floppy ears from felt by cutting out the desired shape and attaching them to a headband. To depict the trunk, create a soft, padded fabric tube that can be secured to the onesie or worn around the waist. Adding small, comfortable gray booties mimics the appearance of elephant feet perfectly. This costume is not just fun but also offers ample room for movement, making it ideal for infants who are on the go.
If you’re looking for something a bit more unique, consider transforming your infant into a little octopus. Start with a long-sleeve blue onesie, and attach long, soft strips of blue or purple fabric as tentacles, securing them around the waist. These tentacles can easily drape down and be lightweight enough for your baby to move without hindrance. For the finishing touch, a soft, captivating hat with large googly eyes can bring your little sea creature to life. This whimsical costume is sure to turn heads and spark smiles at any Halloween gathering.
To compare various DIY animal costumes, here’s a table showcasing key elements:
| Costume | Base Color | Key Features | Materials Needed |
|---|---|---|---|
| Ladybug | Red | Black spots, wings, antennae | Onesie, felt, pipe cleaners, fabric |
| Elephant | Gray | Floppy ears, trunk, booties | Onesie, felt, padded fabric |
| Octopus | Blue | Fabric tentacles, googly eyes | Onesie, strips of fabric, hat |
These creative animal costume ideas are more than just clothing; they are opportunities to bond and explore your artistic side as a family. As you work on these projects, consider personalizing each costume with elements that reflect your child’s personality, ensuring they feel special and loved in their festive attire. Embrace the joy of crafting and celebrate your little one’s first Halloween with a costume that is not only adorable but also uniquely yours!
Essential Materials and Tools
To create the perfect DIY animal costume for your infant, having the right materials and tools on hand is crucial for a smooth crafting process. Here’s a list of essential items you’ll need to ensure your creative endeavors are successful:
- Soft Onesies: Choose onesies in the desired base color for your animal theme. Opt for sizes that provide enough room for movement and comfort.
- Felt Fabric: This versatile material is perfect for making ears, tails, and other costume elements. Get various colors to match the animal you’re creating.
- Headbands: Use these as a base for attaching ears or accessories. Choose soft, elastic ones to avoid discomfort.
- Hot Glue Gun and Glue Sticks: A hot glue gun is great for fast and secure attachments, especially on fabric. Be cautious and allow the glue to cool before handling.
- Scissors: A good pair of fabric scissors is key for clean cuts. Keep them away from little hands when not in use.
- Safety Pins: These are handy for temporarily securing costume elements, allowing for easy adjustments before finalizing the design.
- Soft Fabrics: Consider fleece or cotton for creating additional costume features like wings, tails, or even a mini body suit for an added layer of comfort.
- Markers or Fabric Paint: Use these to add details or personalize designs on the costume. Make sure they are safe for use on fabrics and non-toxic.
- Measuring Tape: Important for taking measurements, especially if you’re creating custom features like a trunk or wings that need to fit perfectly.
- Button or Other Accessories: Decorative touches like buttons can enhance your costume. Ensure they are securely attached and safe for little ones.
Pro Tip: If you’re on a tight budget or looking for eco-friendly options, consider repurposing old clothing items for your crafts. An old sweater can become a cozy body suit or a pair of socks can be top-notch for making animal feet. This not only saves money but also adds a personal touch to your creations.
By gathering these materials and tools in advance, your crafting session will be more organized and enjoyable, allowing you to focus on creating a stunning costume that your infant will flaunt with glee. Make sure to set aside quality time for the project – it’s not just about the end product, but the joyful experience shared while creating together!
Step-by-Step Guide to Making Costumes
To create the perfect DIY animal costume for your infant, follow these straightforward steps that encourage creativity while ensuring your little one looks adorable and stays comfortable.
Start by selecting the base outfit. For many animal costumes, a soft onesie is ideal. Ensure the onesie is the appropriate size and color corresponding to the animal theme you’ve chosen. Once you have your base, it’s time to plan out the additional elements like ears, tails, and other signature features. Make sketches if needed to visualize how the final product will look.
Next, prepare your materials. Gather all the necessary items listed earlier, and organize them in a workspace where you can easily access them. This preparation saves time and makes the crafting process flow smoothly.
Now, let’s begin constructing the costume. For animal ears, take a piece of felt and cut out the desired shapes – larger for floppy ears (like a bunny) or pointed for upright ears (like a fox). Attach them securely to a headband using a hot glue gun, ensuring they are positioned comfortably. Always check the fit by trying the headband on your infant before finalizing the attachment.
For tails, you can craft them from strips of felt or fabric. Sew or glue them to the back of the onesie, ensuring they are securely fastened. A good rule of thumb is to use a lightweight material to prevent it from pulling and causing discomfort.
Next, add any facial features that need to be attached to the costume. For instance, if you’re making a lion costume, create a nose from felt and attach it with fabric glue. Use fabric paint or markers to add additional details to the outfit, making sure they are safe and non-toxic.
Once all major elements are in place, give the costume a complete look. You may want to add accessories such as cute shoes that match the animal theme, or use a soft blanket or shawl to represent fur or scales for certain animals.
Following the assembly, conduct a final check to ensure there are no loose parts or choking hazards. Have your infant wear the costume for a short period in a comfortable environment to gauge their comfort level. Observe how they move; the costume should provide freedom of movement, especially for infants who may be crawling or starting to walk.
Above all, don’t forget to capture the fun moments throughout the process. Enjoy the crafting journey and cherish the laughter and creativity that fills your home as you prepare for the festive day ahead.
“Creativity takes courage.” – Henri Matisse
Safety Tips for Dressing Infants
 It’s vital to ensure that your infant’s safety comes first while dressing them up for Halloween in adorable DIY costumes. Consider the materials you use carefully—soft, breathable fabrics should be your primary choice to reduce the risk of irritation. When selecting any embellishments or accessories, ensure they are securely attached to prevent them from falling off and posing a choking hazard.
Keep in mind the fit of the costume; it should neither be too tight nor too loose. Ensure that the baby has enough room to move freely, which is especially important for infants who may be crawling or beginning to walk. Also, avoid overly elaborate or heavy costumes that might restrict movement or lead to overheating. Instead, prioritize lightweight designs that keep your little one comfortable and safe throughout the festivities.
Be cautious of any small parts or embellishments that could detach easily. Select items designed for infants; for instance, avoid buttons or sequins that could easily be tugged off. Safety pins, while helpful in securing parts of the costume temporarily, should be used with caution. Make sure they are out of the infant’s reach at all times and carefully covered if used.
Lastly, if you’re planning to take your infant out during nighttime, consider reflective materials or accessories to enhance visibility. This adds an extra layer of safety as you stroll around, ensuring that your little one remains visible to others. Embrace the spirit of creativity, but never at the cost of prioritizing your infant’s wellbeing.
- What materials are safest for infant costumes?
- Soft, breathable fabrics like cotton or fleece are best for infant costumes. Avoid any harsh materials that might irritate sensitive skin and prefer non-toxic decorations.
- How can I ensure the costume fits correctly?
- Choose a costume size that allows for ease of movement without being too tight. If possible, have your infant try on the costume before the event to check comfort and fit.
- What should I avoid in my infant’s costume?
- Avoid costumes with small detachable parts, such as buttons or sequins, as they pose choking hazards. Large, heavy elements should also be avoided to ensure comfort.
- How can I make a costume safe for nighttime?
- You can use reflective tape or materials to enhance visibility when taking your infant out at night. Bright colors also help your child stand out in the dark.
- Can I use safety pins in my DIY costume?
- Safety pins can be used for temporary adjustments but should be securely covered and out of reach of the infant to avoid injury.
- How do I keep my baby comfortable in a costume?
- Choose lightweight materials and ensure the costume fits properly. Check frequently to make sure your baby is not too warm and adjust as needed.
- What should I do if my infant is uncomfortable in their costume?
- If your infant seems uncomfortable, remove the costume immediately. It’s important to prioritize their comfort; you can later simplify the attire for better fit.
Capturing the Perfect Halloween Photos
Capturing your little one’s Halloween moments is just as important as the costume itself. With the right tips, you can ensure that every adorable expression and giggle is preserved for years to come. Start by choosing a location that has ample natural light, as this enhances the quality of your photos. Outdoor settings, such as parks or gardens, provide beautiful backdrops with vibrant fall colors, while well-lit indoor areas will also do the trick. Make sure to avoid harsh direct sunlight, which can cause shadows or squinting.
When it comes to posing, aim for natural interactions. Instead of forcing a stiff pose, encourage your infant to engage with their surroundings, whether it’s crawling through fallen leaves or reaching for a pumpkin. This results in candid shots that genuinely capture their joy. A few props can elevate your pictures—think of small pumpkins, festive banners, or soft stuffed animals that tie in with their costume theme.
Additionally, consider the angles from which you’re shooting. Eye-level shots are often the most flattering for infants, as they allow you to capture their sweet faces directly. Experiment with various angles, including some from above, to get creative shots that showcase both the costume and the environment. Using a burst mode on your camera can also be beneficial, as it allows you to take multiple shots in quick succession, capturing those fleeting smiles.
Editing Tips: After you’ve captured the photos, take advantage of basic editing tools. Adjusting brightness, contrast, and saturation can make your images pop. Don’t hesitate to add fun filters or text on social media to create a festive atmosphere. If you’re sharing photos online, consider creating a unique hashtag for your family’s Halloween celebrations—this makes it easy to look back on years to come.
For those last-minute Halloween shoppers, keep an eye out for quick photo ideas. Many stores offer fun photo backdrop kits that can be set up effortlessly, ensuring you don’t miss out on documenting the day. With these tips, you’ll not only have cozy memories captured on camera but also an excellent opportunity to share your little one’s adorable DIY costume with family and friends!


Leave a Reply